


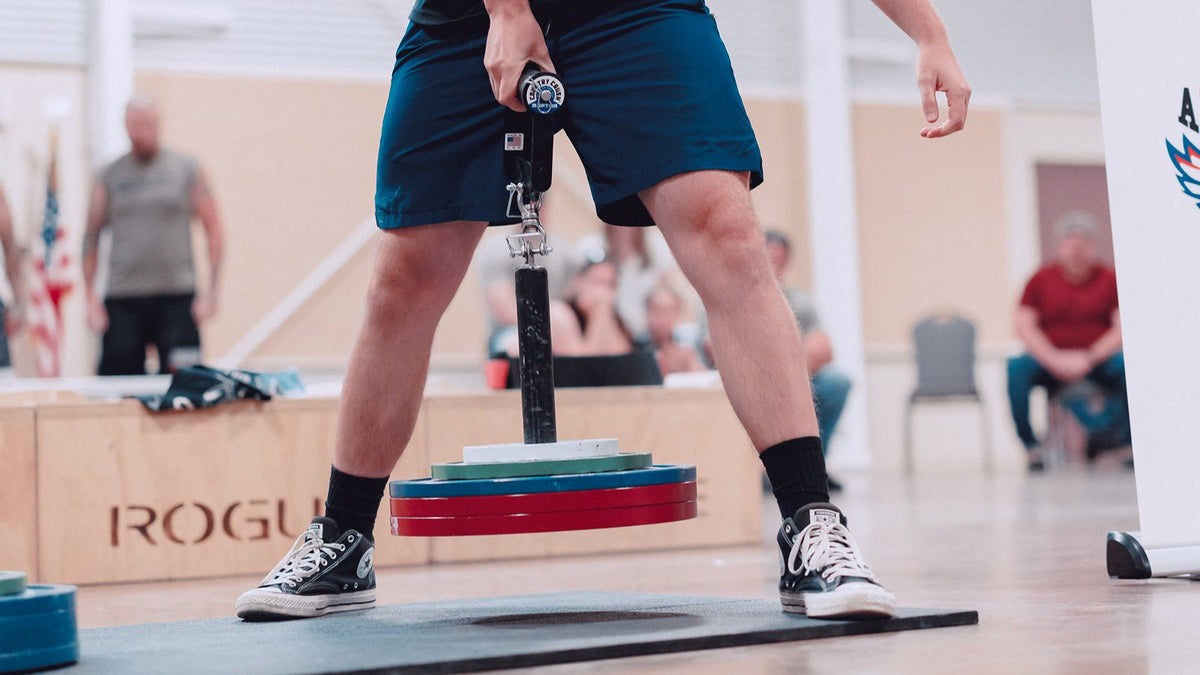
This program is for owners of the Country Crush Two-Hand Revolving Handle, and for serious buyers who want to know exactly what training with one looks like before they commit. If your grip has stalled on fixed-bar work, or you need rolling handle strength for arm wrestling, grip sport or heavy pulling, this is a structured path that gets you there.
Most people who get a revolving handle either wing it with random sets or apply fixed-bar logic to a rolling surface and wonder why the handle keeps rolling out of their hands. A revolving handle is a different implement. It turns under load, demands more from the finger flexors, and needs its own progression model. This 8-week program builds that from the ground up: tendon prep first, then a strength build phase, then a peak phase with heavy singles and timed holds.
Who This Program Is For
This program suits anyone who owns or is considering the Country Crush Two-Hand Revolving Handle and wants a phased plan rather than random sets. It works for arm wrestlers who need rolling grip carryover, for grip sport and armlifting competitors, and for powerlifters and strongman athletes whose pulls are limited by their hands.
You do not need to be a grip specialist. The first two weeks are deliberately light. They exist to condition the tendons, not to test your max. If you have trained grip seriously for more than six months, you can compress Phase 1 to one week, but do not skip it. Connective tissue adapts more slowly than muscle, and a rolling surface stresses the finger pulleys in ways that even experienced lifters underestimate.
What Makes the Country Crush Handle Different
Country Crush is GripStrength.com's own handle brand (the two are the same company), so read this as the program we built for our own implement. The Two-Hand Revolving Handle is a low-friction rolling handle that you train with both hands at once. It attaches to a standard cable machine or a loading pin, and its grips are interchangeable, in five diameters: 1.5, 1.75, 2, 2.5 and 3 inches. The same frame can start at the 1.5-inch position and move past 2 inches as your hands get stronger, so you start where your connective tissue actually is, not where you think it should be.
What makes programming a rolling handle different comes down to one fact: the surface moves under your fingers as the load increases. On a fixed bar, your fingers close and stay closed. On a revolving handle, the grip wants to roll out the whole time, so the finger flexors work through the entire hold, not just at the start. That demand is why rolling handle strength transfers so well to arm wrestling, and why it builds a different kind of endurance than static loading alone.
For a closer look at how revolving handles compare to fixed-bar work, see Rolling Handles vs Fixed Handles. For the full tool landscape, the Complete Guide to Grip Training Equipment covers every category.
How to Load the Handle
For this program, hang the handle from a loading pin loaded with standard plates, or clip it to a cable stack. The program uses bodyweight percentages rather than fixed numbers, because grip diameter changes how hard a given load is. The same 20 kg plate feels completely different at 1.5 inches than at 2 inches, so a bodyweight percentage gives you a stable reference point as you swap diameters over the 8 weeks. Count the handle and the pin in your total.
Finding your starting load: For most people, 5 to 10% of bodyweight is the right starting point on the 1.5-inch grips. A 180 lb (82 kg) athlete starts at 9 to 18 lb (roughly 4 to 8 kg). That feels light, and in Phase 1 it is supposed to. The goal is controlled reps with good tempo, not max effort. You reach real working loads in Week 3.
Loading increments: Add 2.5 to 5% of bodyweight per week during the strength build phase once you can complete every prescribed set at the target effort. If you miss a rep, or the handle rolls out before you finish a hold, stay at the same load the next session.
Grip diameter: Start at 1.5 inches for Weeks 1 to 4. If you hit every Phase 2 target cleanly by Week 5, move up one size (1.75 inches). Do not increase diameter and load at the same time. That is two variables changing at once, and your tendons will let you know they do not like it.
The 8-Week Program Overview
The program runs two sessions per week, at least 48 hours apart. Rolling handle work places an unusual demand on the finger flexors and forearm tendons, and they need more recovery between sessions than most grip tools.
Three phases:
- Phase 1, Tendon Prep (Weeks 1 to 2): Light loads, controlled tempo, extensor balance work. Gets connective tissue ready for heavier rolling loads without irritating the pulleys.
- Phase 2, Strength Build (Weeks 3 to 6): Progressive deadlift triples and doubles on the handle, with static holds added in Week 4. Optional grip diameter upgrade in Week 5.
- Phase 3, Peak (Weeks 7 to 8): Heavy singles, a rep test and peak-load static holds. This is the testing phase, where everything built in Phases 1 and 2 shows up.
Pair every session with extensor work. The rolling surface loads the finger flexors hard and often, and without extensor balance you are building toward tendon irritation. The IronMind Expand-Your-Hand Bands are the extensor bands we carry, or use the GripSaver Plus if you want flexion and extension in one tool. The periodized grip training guide explains the background. Keep extensor openings in every session, whatever the phase.
Phase 1: Tendon Prep (Weeks 1 to 2)
Phase 1 conditions the tendons and builds familiarity with the rolling surface. It is not a strength test. Use the 1.5-inch grips throughout. Start at 5% of bodyweight and add no more than 2.5% of bodyweight across the two weeks. Tempo on the controlled lifts: 2 seconds up, a 2-second hold at the top, 2 seconds down.
Effort is given on a 1 to 10 scale, where 10 is an all-out effort and 7 means about three good reps (or several seconds of hold) left in the tank.
| Exercise | Sets | Reps / Duration | Effort (1 to 10) | Rest | Notes |
|---|---|---|---|---|---|
| Controlled handle lift (1.5" grips) | 3 | 6 to 8 reps | 5 to 6 | 2 min | Start at 5% of bodyweight. Slow, controlled tempo. If the handle rolls out of your hands, reduce the load. |
| Handle deadlift hold (1.5" grips) | 3 | 20 to 30 sec hold | 5 to 6 | 2 min | Lift the handle off the floor and hold at full extension. Focus on a stable position where the handle does not roll. |
| Extensor openings | 3 | 20 reps each hand | 4 | 60 sec | Light band or GripSaver Plus. Full finger extension from a closed fist. Do not skip it: this is your tendon insurance. |
| Wrist curls (light dumbbell or cable) | 2 | 15 to 20 reps | 4 | 60 sec | Wrist flexion only, full range of motion. Keeps the wrist flexors primed without overloading them. |
Two weeks is the minimum. If your finger pulleys are tender after the second session, extend Phase 1 by a week. Better to add a week now than to lose three weeks to a strained pulley later.
Phase 2: Strength Build (Weeks 3 to 6)
Phase 2 is where the real work happens. Load goes up each week, short sets of deadlifts replace the lighter controlled lifts, and static holds are added to build endurance at working loads. In Week 3, Session 1, write down two baselines: the load for your first clean triple and how long you can hold that load. You will compare against them in Week 8.
Add 2.5 to 5% of bodyweight to the lifts each week. If every set felt like a 7 or easier, add 5%. If sets reached an 8 or harder, add 2.5% and hold there before increasing again. Do not rush the diameter upgrade. Moving to a thicker grip at the same load should feel harder; if it does not, the new size is not loading you differently.
| Exercise | Sets | Reps / Duration | Effort (1 to 10) | Rest | Notes |
|---|---|---|---|---|---|
| Handle deadlift: triples (Weeks 3 to 4), doubles (Weeks 5 to 6) | 4 | 3 reps (Weeks 3 to 4) / 2 reps (Weeks 5 to 6) | 7 to 8 | 3 min | Lift from the floor each rep. Full extension at the top, controlled on the way down. Increase load weekly using the rule above. |
| Handle deadlift: single with static hold | 3 | 1 rep + 10 to 15 sec hold | 8 | 3 min | From Week 4 on. Lift, pause at full extension, hold as long as you keep position, then lower under control. |
| Controlled handle lift (moderate to heavy) | 3 | 4 to 6 reps | 7 | 2 min | Heavier than Phase 1. Let the handle turn naturally; do not chase the roll. Keep the fingers working the whole time. |
| Extensor openings | 3 | 20 reps each hand | 4 | 60 sec | Every session, every phase. Move to a medium band (or the next GripSaver Plus level) if the light one feels too easy. |
| Wrist curls | 2 | 12 to 15 reps | 5 to 6 | 60 sec | Moderate load. Keep this an accessory; do not let it become a main source of fatigue. |
The diameter upgrade in Week 5 is optional. If you are still improving steadily at 1.5 inches, stay there and let the load keep climbing. A thicker grip at the same load is real progression, and so is a heavier load at the same grip. Pick one variable at a time.
For how this kind of loading compares with fixed-handle training, see From Iron to Innovation: Modern Grip Tools for Strength Training.
Phase 3: Peak (Weeks 7 to 8)
Phase 3 cuts volume and raises intensity. You are not building new fitness here; you are expressing what Phases 1 and 2 built: heavy singles, a rep test and peak-load static holds. The benchmarks get measured at the end of Week 8.
Do not add load beyond what you reached in Phase 2 unless a set feels clearly easy (a 6 or lower). If Week 7, Session 1 feels off, stay conservative. A bad heavy single is more likely to strain a pulley than a month of Phase 2 work.
| Exercise | Sets | Reps / Duration | Effort (1 to 10) | Rest | Notes |
|---|---|---|---|---|---|
| Handle deadlift: heavy singles | 3 to 5 | 1 rep | 8 to 9 | 4 to 5 min | Work up to your peak Phase 2 load. Three singles near max, and one attempt at a true max in Week 8, Session 2. Do not grind a miss: if it does not break the floor, that is your max for this cycle. |
| Rep test at 70 to 75% | 2 | Max clean reps | 8 | 4 min | Load at 70 to 75% of your best single. Do controlled reps until the handle starts to roll out or your form breaks. Record the number. This measures rolling grip endurance. |
| Static hold at peak load | 3 | Max duration | 8 to 9 | 4 min | Use your near-max deadlift load. Record your hold time; it is one of the benchmarks. |
| Extensor openings | 3 | 20 reps each hand | 4 | 60 sec | Non-negotiable in Phase 3. Heavy singles mean more tendon stress, so keep the extensor balance. |
The rep test has the most direct carryover to arm wrestling and grip sport, because it shows how long you can keep a rolling handle under control as fatigue builds. For sport-specific context, see the arm wrestling grip training program. Loading pins, bands and other supporting tools are in the grip tools collection and the grip sport and armlifting collection.
Programming Notes and Common Mistakes
- Skipping Phase 1. Experienced lifters feel fine in the first Phase 2 session, then develop finger pulley irritation by Week 4. Two weeks of light prep costs nothing compared to three weeks of forced rest.
- Going straight to the thickest grip. A thicker diameter changes which structures take the load. Start at 1.5 inches and earn the upgrade by hitting the Phase 2 targets cleanly.
- Skipping extensor work. Three sets of openings at the end of every session takes five minutes. Without them, you build an imbalance that will eventually cap how much you can load the handle.
- Training too often. Two sessions per week is right. Connective tissue fatigue is not always felt in the muscle; you can feel fine and still be under-recovered.
- Ignoring static holds. Holds are where grip endurance is built. Skip them in Phase 2 and your Phase 3 rep test will stall.
How to Test Progress
Run these four benchmarks at the end of Week 8, in the second Phase 3 session. Record every result and compare it with your Week 3 baselines.
| Benchmark | How to Test | What Progress Looks Like |
|---|---|---|
| Handle deadlift max | One rep, the heaviest load you can break off the floor | Clearly above your Week 3 triple load; 20% or more is a good cycle |
| Static hold | Hold your Week 3 triple load; measure seconds until the handle rolls out | Longer than your Week 3 hold at the same load |
| Rep test | Load at 70 to 75% of your max; count controlled reps | Reps stay controlled to the end of the set rather than ending in a sudden roll-out |
| Grip diameter | The thickest grip you can deadlift for a clean triple at your Week 3 load | 1.5" clean by the end of Phase 2; 1.75" clean by the end of Phase 3 if you upgraded |
If your max has not gone up by at least 20% over your Week 3 triple load, your weekly increments were probably too conservative. If your hold time has not improved, you likely skipped holds in Phase 2. Both are fixable in the next cycle.
After the 8 Weeks: What to Do Next
Do not start the program again straight away at the same diameter. Take a 4-week easy block first: drop back to Phase 1 loading (5 to 10% of bodyweight), two sessions per week, no max efforts, and let the tendons fully recover. This is not wasted time. It is what makes the next loading cycle possible.
After that, run the program again one diameter up. If you peaked at 1.5 inches, move to 1.75 inches for Cycle 2. The progression model stays the same; the implement gets harder. Over several cycles you can work up through the full range of grips, each cycle building on the connective tissue capacity of the one before.
The periodized grip training guide covers the progression theory in full, and the Grip Training Encyclopedia shows where rolling handle work fits in the bigger picture.
Frequently Asked Questions
Can I run this program if I don't own the handle yet?
You can read through it to see what training on a revolving handle looks like, but a fixed barbell is not a substitute: the way the hand works is different enough that the program will not give the same result. If you are researching before buying, the Two-Hand Revolving Handle listing shows the grip sizes and options.
What if I have the Raptor, the single-hand rolling handle?
The program works on the Country Crush Raptor too. Run every lift and hold one hand at a time, start each hand at about half the two-hand load, and record each hand separately. The Raptor takes the same grip sizes, so the diameter progression is identical. See rolling handles vs fixed handles for how the implements differ.
Do I need to buy a new handle to move up a diameter?
No. The frame stays the same and you swap the grips. The Two-Hand Revolving Handle uses two grips of the same size, sold as a pair in the Country Crush and Raptor grips listing; the Raptor uses a single grip.
Should I switch grips mid-program?
Not before Week 5. The diameter upgrade is built in as an optional milestone at that point, when you have two weeks of tendon prep and two weeks of real loading behind you. If Phase 1 feels too easy, that is intentional.
Can I do this alongside arm wrestling training?
Yes, but keep at least 48 hours between a handle session and arm wrestling practice (72 is better). Phase 1 alongside regular practice is fine. In Phases 2 and 3 you may need to cut practice volume. See the arm wrestling grip training program for how to layer the two.
What if my forearms get sore in the second week?
Soreness in the forearm muscles in Weeks 1 to 2 is normal; the rolling surface works the finger flexors differently than fixed-bar work. Soreness at the finger pulleys (the palm side of each finger) is different and is a warning sign. Reduce the load and extend Phase 1. Do not push through pulley pain on a rolling implement.
Your Next Step
If you are ready to put this program to work, the Country Crush Two-Hand Revolving Handle is the implement it is built around. It works on a loading pin or a cable machine, takes interchangeable grips from 1.5 to 3 inches, and is built for the kind of long-term, progressive rolling handle training this program delivers. Training one hand at a time? The Country Crush Raptor runs the same program.
For supporting equipment, see the Country Crush loading pins, the grip tools collection and the grip sport and armlifting collection.
For broader programming context, the Grip Training Encyclopedia connects rolling handle training to the rest of your grip work and shows where each tool fits.
0 comments